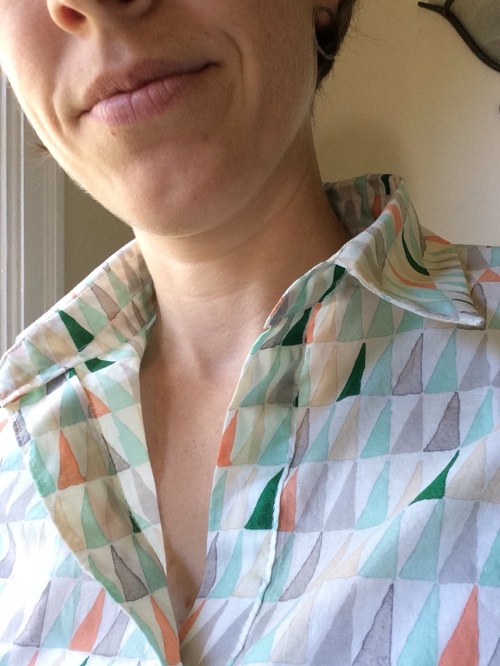
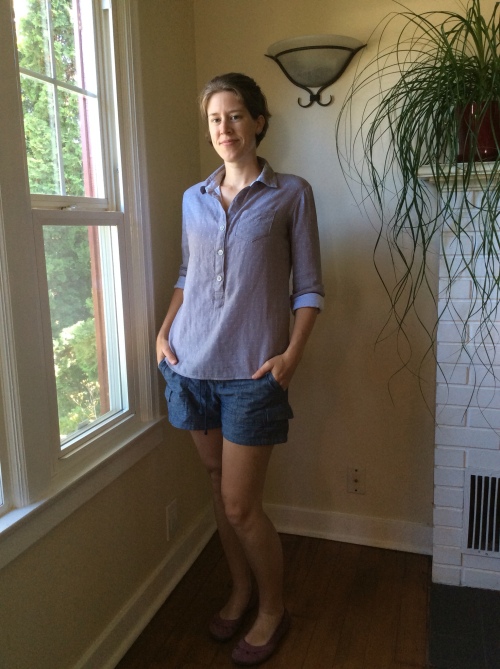
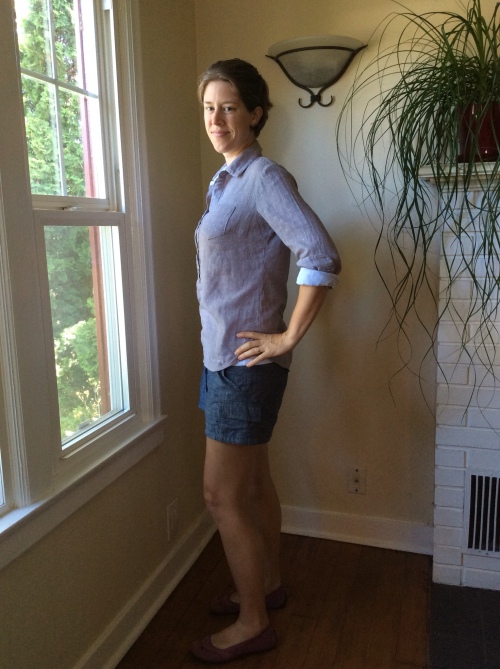
I really love Sewaholic patterns (and I'm really curious to see what the new owners will do with the pattern line), and I especially love the Granville pattern. I've made a few versions of it (unblogged), and it is one of my favorite tops to throw on for either work or casual outings.
Over the summer, though, I decided I wanted to make a few more casual style popover tops, so I spliced together the Granville pattern with the Oakridge to create a loose collard shirt with a front button placket. Alternatively, though, you could do this with any shirt pattern (and one that has back darts would negate having to make the changes I did to the back). I really like how Granville fits me through the bust and the sleeves, though, so that's what I used.
I pretty much left the front of the Granville shirt in place, but I eliminated the seam allowance and cut it on the fold instead. It's very easy to do a button placket down the front (basically, it's just like doing a cuff tower placket, actually), and there are a few tutorials online. Conveniently, once you have your pattern pieces set (and you can use either two pieces or a single shaped piece, as Tasia did with the cuff plackets), you can use them on any blouse that has a solid front, which is really nice.
My placket is about 1 1/4″ wide here–a bit too wide, actually, and I narrowed it on later versions. Some of the tutorials I've found have you tuck the bottom of the placket to the inside. I did that originally and didn't like it much, so I now always make the bottom placket into a nice arrow shape (or square it off if I'm working with a particularly tricky and slippery fabric). I've also seen a rounded placket, notably from Florence of Flossie Teacakes. I'm really in awe of Florence's smooth curve on the placket (not to mention the sleeves on that shirt, with their absolutely perfect drape); no wonder the lady does English paper piecing! Needless to say, I haven't yet had the courage to try a rounded placket and I also haven't seen a tutorial anywhere for one, although I'd guess that Threads has some info somewhere in their archives.
One major change involved using the back piece of Oakridge instead of the princess seamed Granville. I didn't want this shirt to be too fitted through the back and using the Oakrdige pieces also meant less pattern matching across seam lines. I think that Oakridge and Granville were drafted from the same block (maybe?), so they almost matched, although I did have to adjust the armscye slightly. Other than that, though, this wasn't too bad of a hack. I'm sure I could use a swayback adjustment (something I should probably always do), but fabric pooling there doesn't bother me the way it seems to annoy some people, so I hardly ever bother to make the adjustment.
Since I mostly have worn these lightweight shirts in the summer, I also didn't bother with the full length sleeve. Instead, I did a three-quarter sleeve and added a button tab.
And I used Andrea's technique for the collar, as always, which is my favorite. Does anyone ever use a different method these days? I feel like she must be Sewing Internet Famous for this tutorial.
One final confession (made in a guilty whisper): I didn't interface the collar or stand. Or the placket, actually. I did use tiny bits of interfacing for the button holes, but that was it. Voile, to me, can often be fairly stiff on its own, and I only had a heavierweight interfacing on hand and was too lazy to go get new stuff. Besides, I've been wanting to order really high quality interfacing (rather than the Pellon from Jo-Ann's), and figured I might as well give it a try since I'm out of the old stuff (finally!). I didn't get around to ordering any, though, before making this shirt, so I just went without. The collar seems fine–it's a little limp, but I don't love crisp collars on casual shirts, so it works for me.
I've been so happy with this style that I've made it a few different times, including in a wonderful double gauze from Organic Cotton Plus. This is an amazing gauze–ridiculously soft and yet quite strong and durable. I've washed it several times since I made the shirt this summer with absolutely no problems. And I love the reverse color in the sleeves (which I made as full sleeves on this version) and collar.
I love the little pindots and the color, which is a kind of lavender grey–very subtle.
Since fall is now quickly descending here in the Pacific Northwest, I have a feeling I'll be digging out this pattern again for a few flannel versions–the kind that are perfect for coffee shop visits and dog cuddling.


Fab popover shirts, I think they look great on and are a wardrobe staple, I think mashing the patterns together was a great idea, they both look spot on. I need extra practice on half plackets/collars and especially sleeve plackets.
Thanks, Lynsey! I find I do the half placket differently every time, so I’m going to have to sit down and write out some notes for the best way to do it. I haven’t found many good tutorials for it, which is a bit surprising. Maybe I should check one of my actual sewing books instead of just hunting around online, right?